Thursday, June 27, 2013

The frame set is complete through paint and interior coating.  Although, I just found a couple of small spots I want to buff out.
 My apologies for the poor quality of my photos.

Notice the rear fender mount on the bottom of the brake bridge.


 Tried to grab the purple.  The pearl just won't show up, but it is a beautiful livery in its simplistic boldness!


Friday, June 21, 2013

 Masked and ready for the Eggplant Purple.

 I was a little skeptical on the color selection.  But, it really looks great!

Thursday, June 20, 2013

 The pearl is on and I thought the pics would come out great because of the momentary sunshine.  I was wrong.  I think the pearl is too reflective.  And, this is still prior to the clear coat.  But, it is a stunning color!  Time for a ride...........


The white base coat is on.  Unfortunately, the sealer failed in a very small area on the bottom of the down tube that I will have to repair before I apply the pearl.
Let's get this paintfest started.  Primer is boring, so I didn't take any pics.  The white base coat is next, then the pearl.

Monday, June 17, 2013

 I'm really itching to get started on Sellwood Dans paint job.  I've blocked down the logo on the fork, cut my maskants, and bought the paint.  By tonight, the frame should be through glass bead blast and in etch prime.
I tried to capture the purple for the panels, but as we know, you just can't do that with a camera.

Thursday, June 13, 2013

 Facing the head tube.
Chasing the bottom bracket threads, then I will just "kiss" the faces.
Reaming the seat tube for the seat post.  I always like to ream and hone the the actual post that will be used, surprisingly, they do vary a bit.
 The seat post slot is done.  In spite of how it looks in the photo, it is perfectly square.
 Time to form the head badge so I can drill and tap the mounting holes in the head tube.
Always check for square.

Sunday, June 9, 2013

I don't want Dan to have to remove his brake caliper every time he wants to remove the rear fender. So I braze on an eyelet and drill and tap into the bridge. Makes for a secure, easy to remove, and good looking mount.
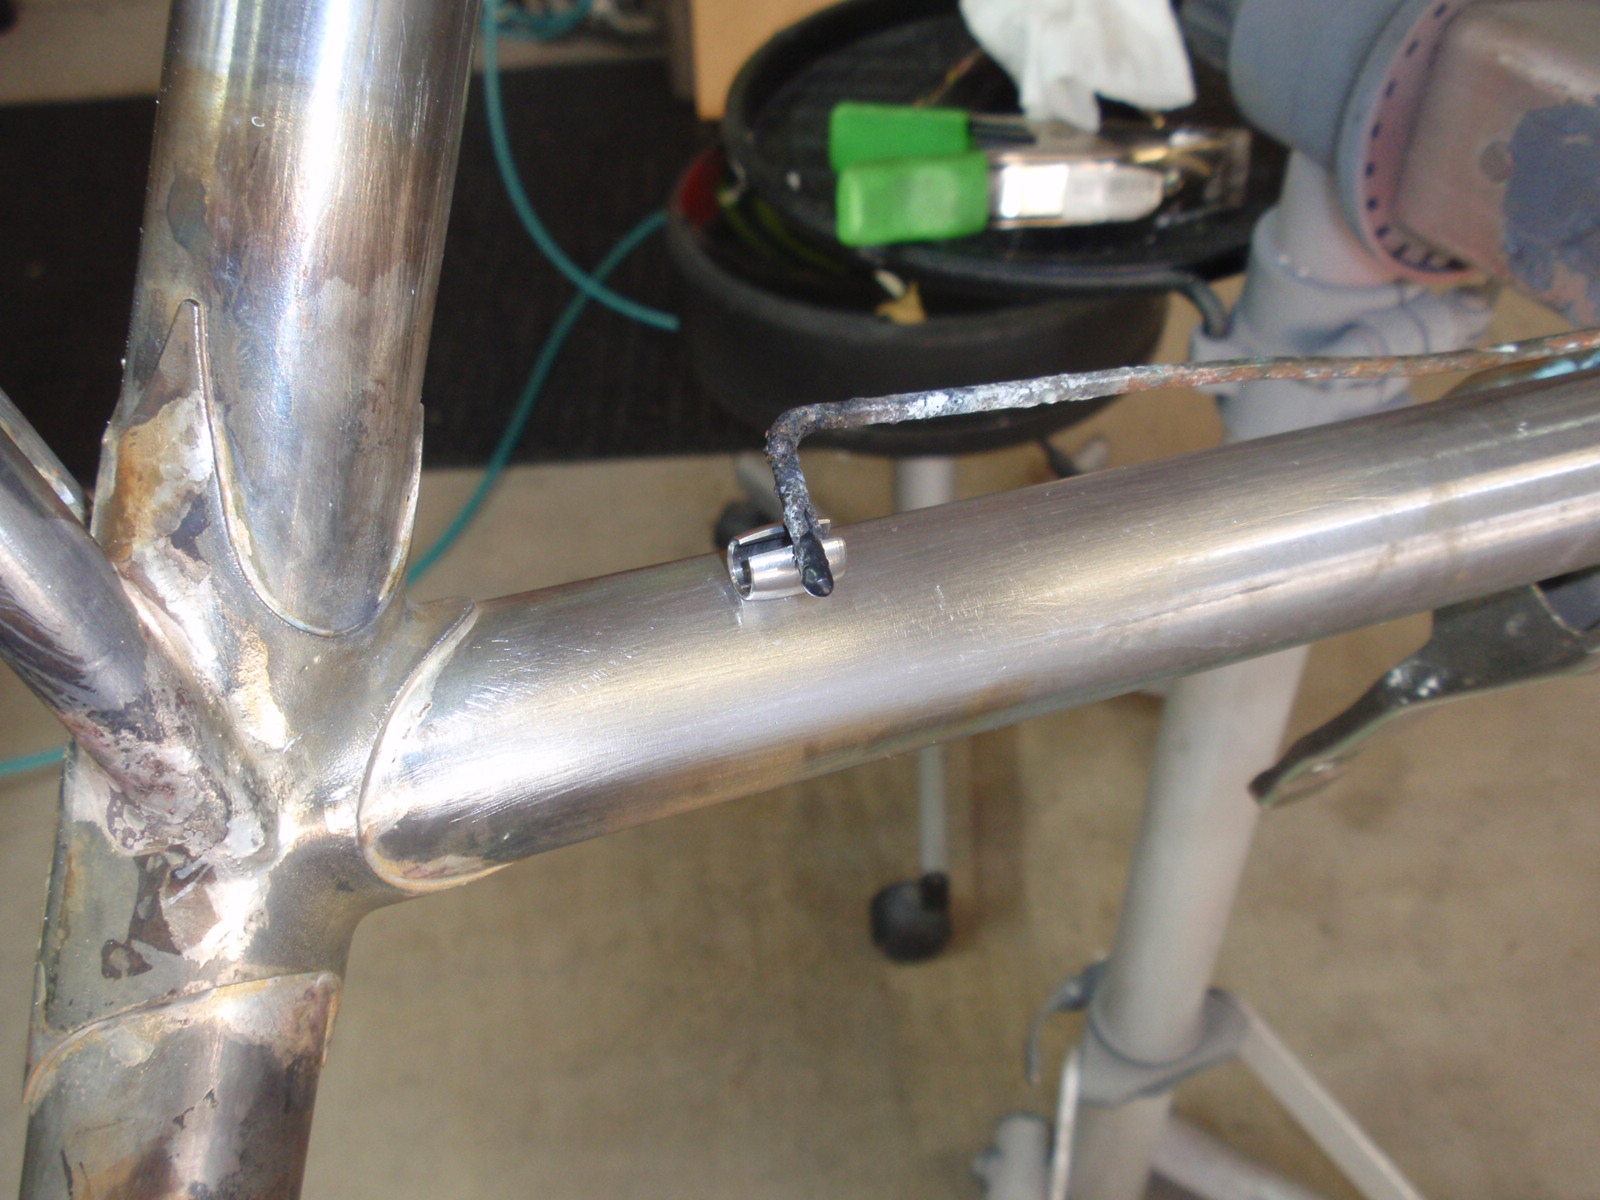
 Dave brought over an old Ciocc frame with a damaged cable guide.
 The replacement went straight forward even though I was a little concerned about the tube blowing through due to all the corrosion pitting.
I got my trusty piece of angle aluminum to verify the alignment, only to discover that not one of them were centered on the top tube nor to each other.  Kinda cool, so I brazed the new guide exactly where the old one was.
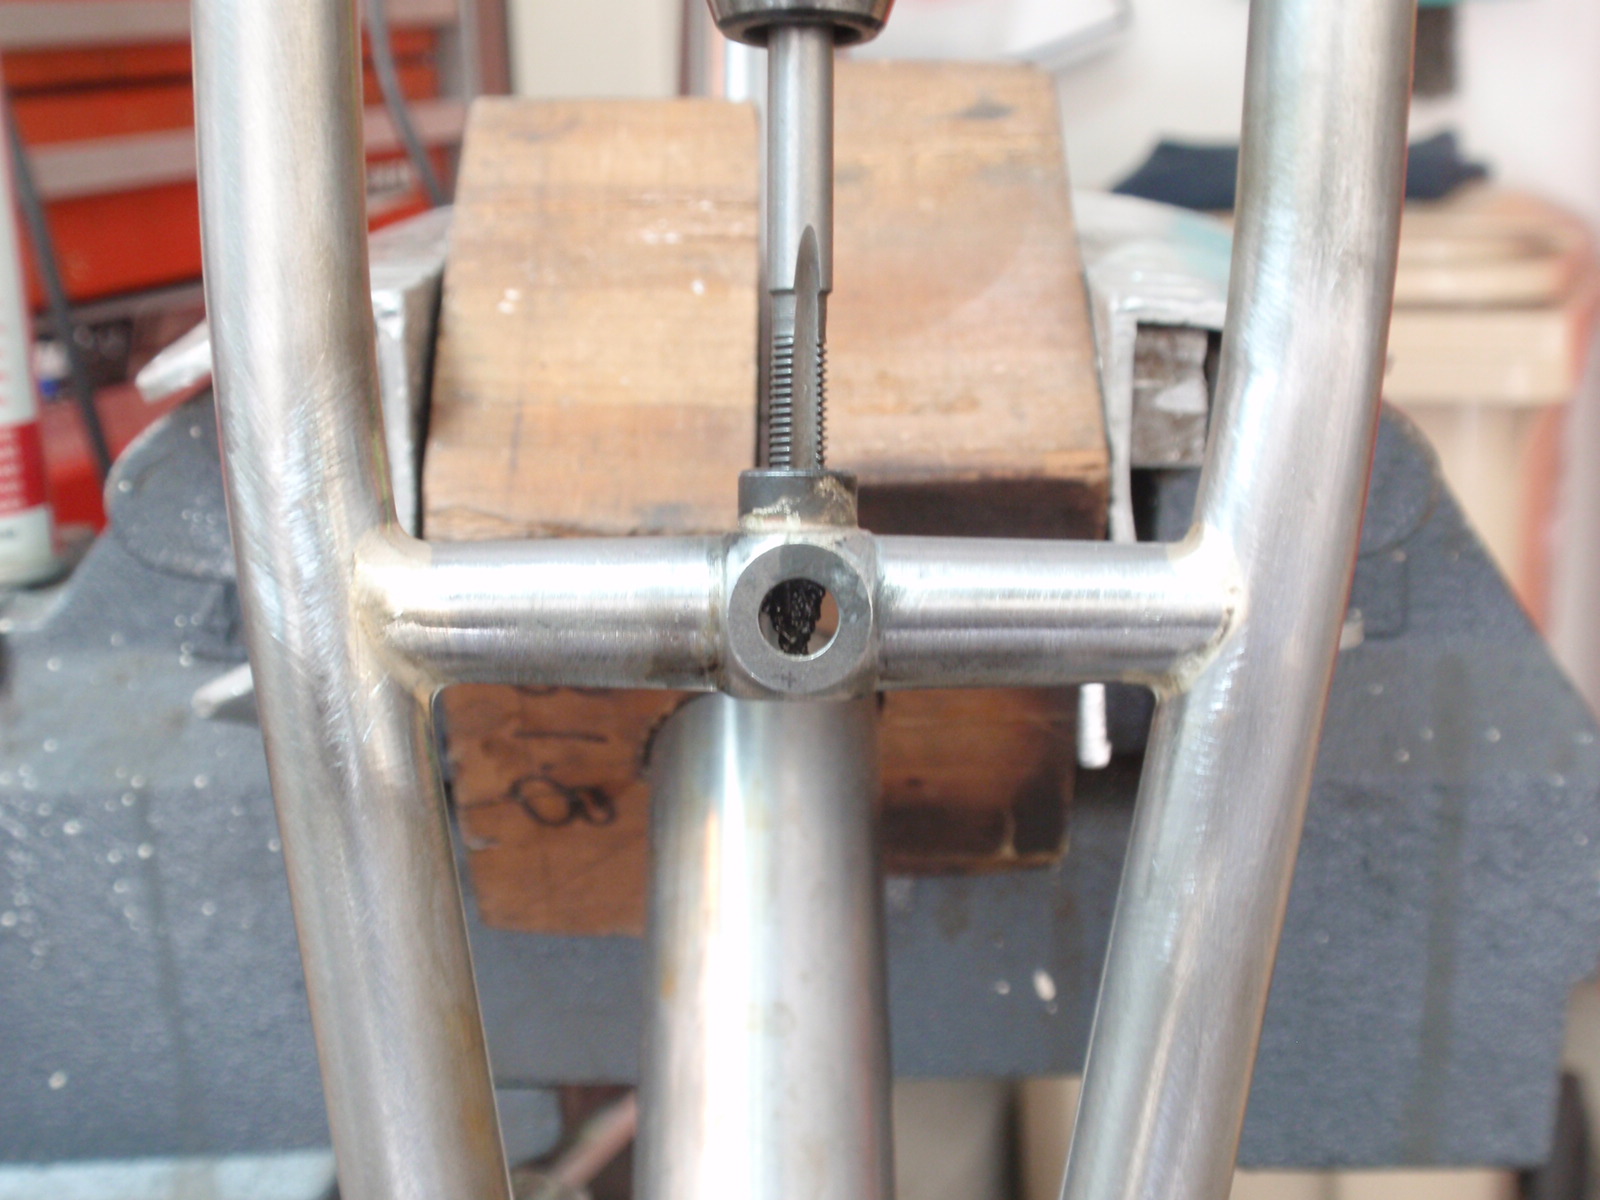
Thursday, June 6, 2013

Mocking the brake bridge up to determine how much clearance I can get.
 In the end, I decided to go with 51 mm that matches what the fork allows.
 Getting the miter just right.
Brazing on the last stainless steel cable stop.